
What Is Lippage in Tile Flooring? Causes, Prevention, and Solutions
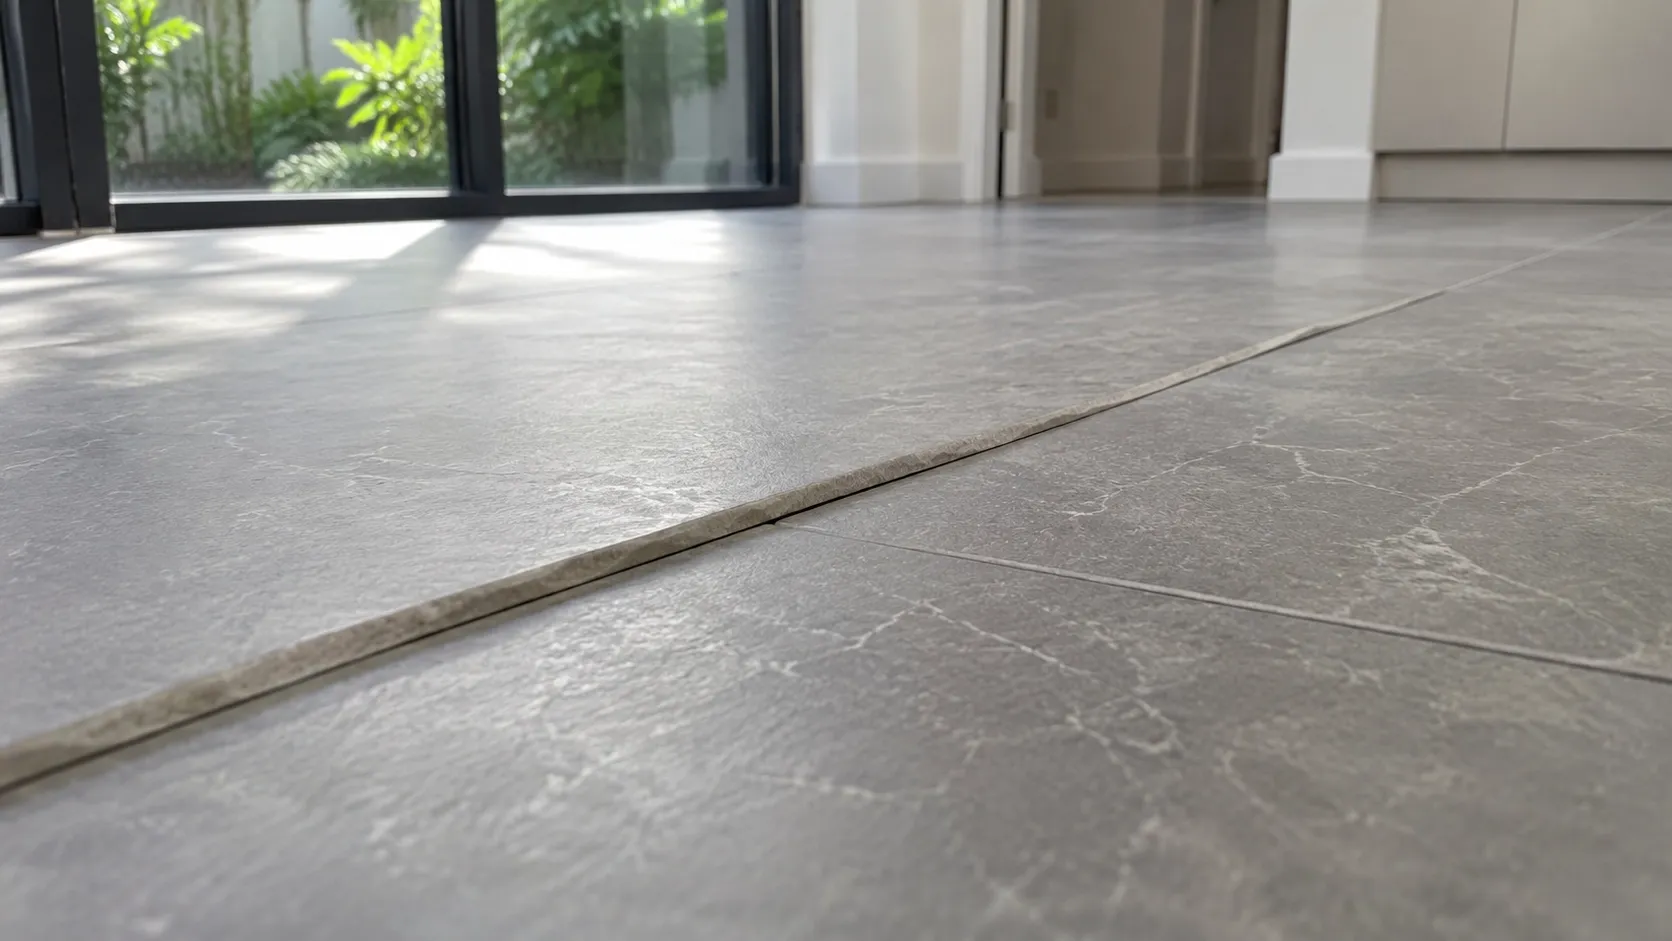
Lippage in tile flooring is the height difference between the edges of two adjacent tiles. It creates an uneven surface where one tile sits higher than the next. This can affect a floor’s appearance, comfort, and safety, especially in areas with frequent foot traffic.
Tile lippage can occur with porcelain, ceramic, and natural stone tiles. Several factors contribute to it, including uneven subfloors, tile warpage, installation techniques, and grout joint spacing. Understanding these causes helps homeowners recognize installation problems and make better decisions when choosing tiles or planning a flooring project.
What Does Tile Lippage Mean?
Tile lippage describes the vertical difference between the finished surfaces of neighboring tiles. For example, imagine running your hand across a tiled floor. If one tile edge feels higher than the tile beside it, that height difference is lippage.
Some degree of lippage can occur because tiles have manufacturing variations. Installation conditions also influence the final result. However, excessive lippage creates noticeable uneven edges and may cause discomfort when walking across the floor.
Lippage is different from grout joint irregularities. Grout joint problems involve inconsistent spacing or alignment between tiles. Lippage specifically refers to differences in surface height.
It is also important to distinguish lippage from an uneven floor. An entire floor may slope slightly while individual tiles remain aligned. Lippage occurs when adjacent tile edges do not meet at the same height.
What Causes Lippage in Tile Flooring?
Several conditions can contribute to uneven tile edges. Identifying the underlying cause matters because correcting the wrong problem may not produce a lasting result.
Uneven Subfloors and Poor Surface Preparation
A flat, properly prepared surface provides the foundation for successful tile installation. If the subfloor contains dips, raised areas, cracks, or uneven sections, tiles may sit at different heights.
Large-format tiles are particularly sensitive to substrate irregularities. Their size makes it harder to follow changes in the floor without creating uneven edges.
Installers should check substrate flatness before applying thin-set mortar. They may need to use patching compounds, leveling materials, or other preparation methods to correct problem areas.
Skipping this step can lead to installation defects that remain visible even after the grout has cured.
Incorrect Tile Installation Techniques
Installation technique has a direct effect on tile alignment. Applying inconsistent mortar coverage or failing to set tiles at the correct height can create lippage.
Common installation mistakes include:
- Applying too much mortar beneath one tile compared with neighboring tiles.
- Failing to collapse mortar ridges during tile placement.
- Pressing tiles unevenly into the mortar bed.
- Rushing installation without checking surface alignment.
- Using an unsuitable trowel size or installation method.
Proper mortar coverage is important for both alignment and long-term tile performance. Installers should follow the mortar manufacturer's instructions and applicable installation standards.
Tile Warpage and Natural Variations
Tile warpage refers to a slight curve or unevenness in a tile's surface. This variation can occur during manufacturing, particularly with certain large or elongated tiles.
Even when tiles come from the same product line, their surfaces may not be perfectly flat. Natural stone can also have variations in thickness and surface characteristics.
These differences can influence the final installation. A tile with a slightly raised center or curved edge may sit differently beside another tile.
Before installation, checking tiles for visible variations helps installers select an appropriate layout and plan the grout joints.
Tile Size, Pattern, and Grout Joint Width
Tile dimensions and installation patterns can increase the risk of lippage. Large rectangular tiles, for example, may have slight curvature along their length.
A running bond pattern with a 50% offset can place the highest part of one tile near the lowest part of the next. This may make existing warpage more noticeable.
Some manufacturers recommend limiting offsets to 33% for certain rectangular tiles. Always check the product's installation guidance rather than applying one layout rule to every tile.
Grout joint width also matters. Narrow joints can make small differences in tile edges more noticeable. Appropriate joint spacing helps accommodate dimensional variations and supports a consistent installation.
How to Identify and Measure Tile Lippage
You can often identify tile lippage through a simple visual and physical inspection.
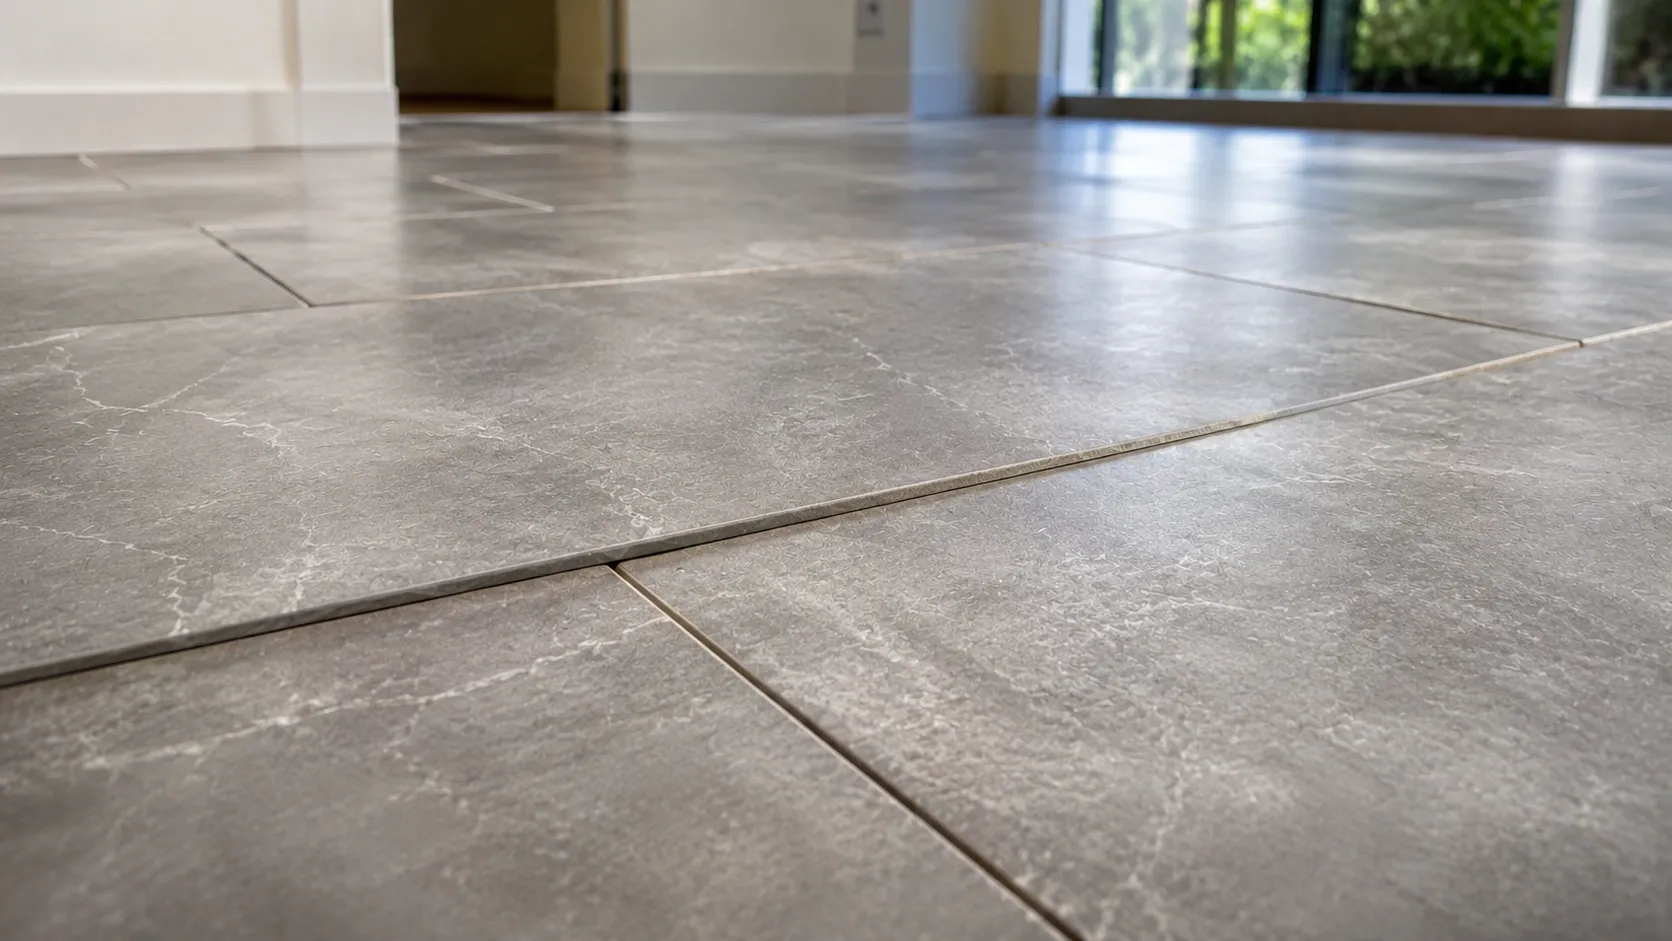
Look across the floor from a low viewing angle. Changes in light and shadow may reveal raised tile edges, particularly near windows or reflective surfaces.
You can also carefully run your hand across neighboring tiles. If one edge feels noticeably higher, that area may have lippage.
For a more precise assessment, use a straightedge and a suitable measuring tool. Place the straightedge across adjacent tiles and measure the vertical difference between their surfaces. Avoid confusing the natural curve of a tile with an installation-related height difference.
A professional assessment should consider:
- The tile material and product specifications.
- The width of the grout joints.
- The tile's inherent warpage.
- The applicable installation standard.
- The condition and flatness of the substrate.
Lighting can make lippage appear more pronounced. Reflective finishes and strong side lighting often highlight small surface differences that may be less noticeable under other conditions.
How Much Tile Lippage Is Acceptable?
There is no single acceptable tile lippage limit for every flooring project. The permitted amount depends on the tile type, grout joint width, inherent warpage, and applicable installation standards.
For ceramic and porcelain tiles, ANSI A108.02 provides installation guidance that considers grout joint width and tile warpage. The acceptable difference is not simply a fixed measurement that applies to every product.
Natural stone tiles may follow different guidance. The Natural Stone Institute's recommendations also account for the characteristics of the stone being installed.
For this reason, homeowners should avoid relying on a universal online measurement when evaluating a completed floor. A tolerance suitable for one tile product may not apply to another.
The Tile Council of North America (TCNA) explains how tile characteristics, joint spacing, substrate conditions, and lighting influence lippage.
If you notice uneven tile edges, compare the installation with the relevant product requirements and applicable standards. A qualified tile professional can help determine whether the condition falls within the expected tolerance.
How to Prevent Lippage During Tile Installation
Preventing tile lippage starts before the first tile is installed. Proper planning, suitable materials, and consistent workmanship all contribute to a more even floor.
Prepare and Level the Subfloor
Begin by inspecting the installation surface. Remove loose material, repair damaged areas, and address dips or raised sections.
Check the substrate against the flatness requirements for the selected tile size. Larger tiles generally require tighter substrate flatness tolerances than smaller tiles.
Do not assume that additional thin-set mortar will correct an uneven floor. Mortar is designed to bond tiles, not replace proper substrate preparation.
Choose the Right Tile Layout and Grout Joint
Select a layout that works with the tile's dimensions and surface characteristics. For long rectangular tiles, a running bond pattern with a reduced offset may help limit visible lippage.
Follow the manufacturer's recommendations for grout joint width and installation patterns. Rectified tiles may support narrower joints, but they still require appropriate spacing.
Bay Stone Depot offers different floor tile options for residential and commercial applications. Comparing tile sizes, finishes, and materials before installation can help you select a suitable product.
Use Proper Installation Tools and Techniques
The correct tools help installers maintain consistent tile placement. Depending on the project, these may include:
- Notched trowels suited to the tile and mortar.
- Tile spacers for consistent grout joints.
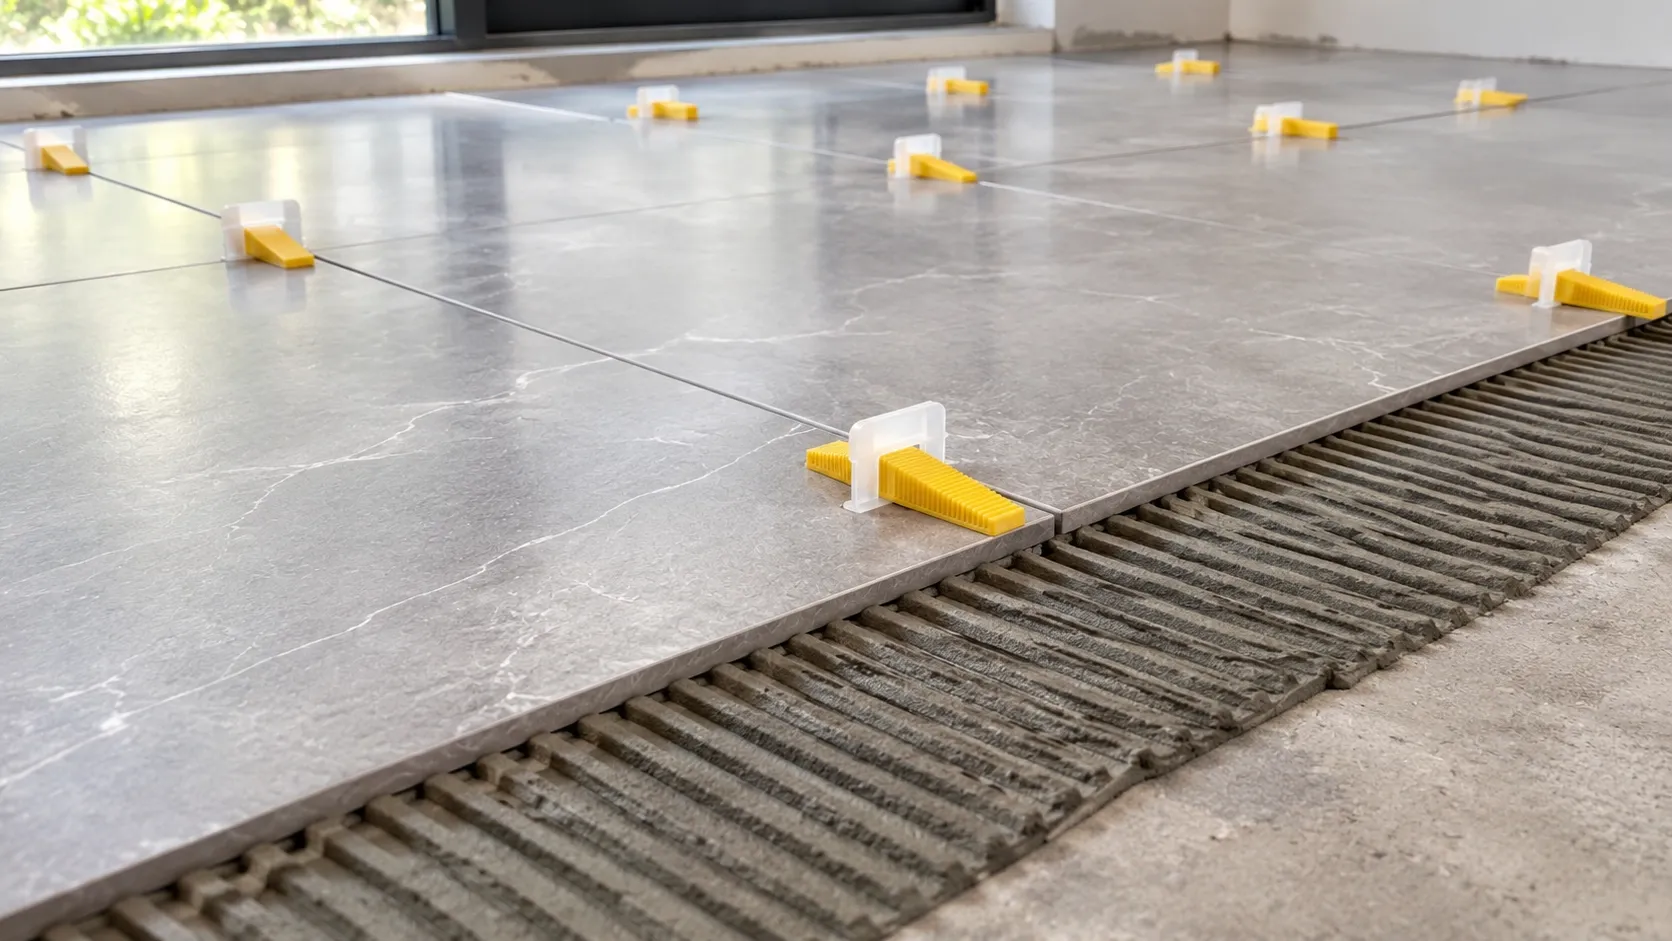
- Tile leveling clips and wedges.
- Straightedges for checking surface alignment.
- Appropriate mixing and measuring equipment.
Tile leveling systems can help hold neighboring tiles in alignment while the mortar cures. However, they cannot correct a badly prepared subfloor or eliminate tile warpage.
Check Tile Alignment During Installation
Checking alignment throughout installation is easier than correcting problems after the mortar has cured.
Use a straightedge to inspect neighboring tiles as work progresses. Adjust tiles while the mortar remains workable, and check grout joint spacing regularly.
Good lighting also helps installers spot uneven edges before completing the floor. Consistent inspections reduce the risk of leaving visible installation defects behind.
How to Fix Lippage in Existing Tile Flooring
The right repair method depends on the severity of the lippage, the tile material, and the condition of the existing installation.
For minor issues, a professional may be able to improve the appearance through localized adjustments. However, once the mortar has cured, simply pressing a raised tile down will not correct the problem.
More significant lippage may require removing and reinstalling affected tiles. The installer may need to correct the substrate before placing replacement tiles.
Grinding or honing can sometimes reduce raised edges on suitable natural stone surfaces. However, this approach depends on the stone type, finish, tile thickness, and amount of material that must be removed. It is not suitable for every tile, particularly many glazed or finished porcelain products.
Grout is not a reliable solution for correcting height differences. Adding extra grout around raised edges may create an inconsistent appearance without fixing the underlying issue.
Conclusion
Lippage in tile flooring occurs when neighboring tiles have different surface heights. Uneven subfloors, tile warpage, incorrect installation techniques, and unsuitable layouts can all contribute to the problem.
The best approach is to prevent lippage through proper surface preparation, suitable tile selection, consistent grout joints, and careful installation. When evaluating an existing floor, consider the tile material and applicable installation tolerances before deciding whether repairs are necessary.
Choosing the right tile also makes a difference. Bay Stone Depot offers porcelain and natural stone tile options for different flooring applications. Homeowners and design professionals can explore the available tile collections and arrange a design consultation to compare materials for their projects.